ADVANCED ANIMATION - FINAL PROJECT
ADVANCED ANIMATION - FINAL PROJECT
27TH AUG - TBA (WEEK 1 - WEEK 14)
NG VEYHAN (0349223) / BACHELORS OF DESIGN (HONS) IN CREATIVE MEDIA
ADVANCED ANIMATION
ASSIGNMENTS DOCUMENTATION
Module Information
Lecture Notes
WEEK 2
We covered some of the basic file settings that would be used during our animation exercises.
-Size Resolution
High Definition for Digital Video
720p - 1280 x 720
1080p Full HD - 1920 x 1080
Frame Rate
Video - for TV - 25fps
Film - 24fps
Mr. Kamal also covered some of the animation concepts used for this module.
Timing:
Using the amount of unique frames to determine the duration of a given action in the animation
Higher number of frames = Slower movement
Lower number of frames = Faster movement
Spacing:
The distance of change in position across frames to indicate speed of the object
Smaller spacing = Slower movement
Larger Spacing = Faster Spacing
Can be combined to create slow in/out effects. (deceleration and acceleration)
Arcs
In animation, arcs are used to denote gravitational pull on an object
Arc movement requires at least 2 axes.
Exceptions are for movements that do not involve a downwards vector movement. (i.e. ball rolling on flat ground)
WEEK 4
Squash & Stretch
Animation style determines whether squash and stretch is used
Cartoony styles tend to lean more towards its use, with much exaggeration of character movements.
Realistic styles tend to not use squash and stretch, but still suffers from uncanny valley effects currently.
How much the object stretches gives an idea on its hardness.
Less stretch = harder material
More stretch = softer material
Volume must be kept consistent
The object must become skinnier as the length stretches.
Conversely, object must become wider as the length shortens.
WEEK 5
Clarity in Animation
One action to be staged at a time.
Actions can be defined into a main action (e.g. body running, jumping) and an extra action (e.g. hair waving, cloth and hands swaying)
Secondary actions serve to enhance the message being sent by the main action.
Also creates anticipation on the characters actions, emotion, objectives.
Solid Drawing
Line of action
A fully straight body implies stoicism
An S-shaped body is a neutral pose.
Imbalance line of action is for an action
Camera framing
Helps to tell a story with movement
Long shots and Establishing shots - Help establish location
Full shots - Conveys an action
Close up shots - For expressions
Extreme close ups - To show great detail/macro lens shot
Camera Angle
WEEK 7
Planning in Animation
Ideas >>> Motion Study (References) >>>Thumbnail Drawing
Identify the Key poses - For storytelling
Then work out the extreme poses of the animation
Breakdown the timing for the animation
Work on the in-betweens
1. Finding the Poses (Extreme)
For a jump animation, for example:
- fully squatting
- fully extending
- squatting from landing
2. Study the Solid Drawing
- Line of Action
- Silhouette
- Avoid twinning animation (parallel)
Weight and Balance
> Skinny/Fat body types:
- Spine Bending
- Centre of gravity
- Shoulder Rotation
- Hip Rotation
Practical
For the first week of our exercises into advanced animation, we were supposed to animate the movement of a ball bouncing.
All that was required in the exercise was to animate the vector movement of the ball across the composition. Similar to how one would edit position movement in After Effects, keyframing is the primary method used to animate the ball.
In order to smoothen the movement of the ball and give it an ease in/out effect, the graph editor allowed the alteration of velocity of the ball between the two keyframes, creating a less linear movement.
As a bit of an extra, I tried altering the bones of the ball as well. Building on the squash and stretch principles of animation, the collision of the ball with a surface would result in a squash effect, while it travels at maximum velocity, it would create a stretch effect.
The rigging of the ball was intuitive and I felt that it was quite easy to manage, given the simplicity of a single sphere. Changing the timeline to a dope sheet also allowed me to keep track of the keyframes in every single variable of the balls movement.
(Fig 04, Completed Exercise, 11/9/2022)
The next exercise involves animating a swinging motion of a pendulum arm. The way that the rigging is structured is reminiscent of a limb. The aim of this exercise is to animate the arm simulating a sudden stop of motion on the base of the pendulum, with the arm slowly experiences a loss of inertia as it swings back and forth.
(Fig 05, Pendulum Arm Rig, 27/9/2022)
The keyframes for the swinging of the pendulum are quite straightforward as the movement only involves the arm swinging around two axes instead of three. For the distance from the center the arm swings after each pass, I divided the number by two after each swing until it is negligible from the middle.
(Fig 06, Pendulum Bone, 27/9/2022)
Most of the difficulties in animating this pendulum swinging lies in motion blocking as the momentum is slowly lost as it approaches the climax of each swing, rather than stopping immediately. Using the motion graph, the motion is eased out to create a smoother transition in direction.
(Fig 07, Pendulum Keyframing, 27/9/2022)
(Fig 08, Pendulum Ball Animation, 27/9/2022)
The next exercise we were assigned is create a character pose which could effectively portray a state of emotion for a character. I wanted to create a pose that portrays the character being mildly annoyed for being distracted.
(Fig 09, Snow Facial Rig, 5/10/2022)
I worked on posing the face of the character first as it would be more difficult to pose after the body since having the head rotated would make positioning the bones of the face variable on multiple different axes.
(Fig 11, Snow Hand Rig, 5/10/2022)
To pose the body, the distracted pose of the character required something for him to be doing. As such I created a pose of reading a book. As the face has a calm and cool demeanor, I wanted the body language of the character to reflect that. I feel it worked best by posing him leaning against something.
(Fig 12, Book Modelling, 5/10/2022)
While not required within this assignment, I added a prop for the character to interact with, a book. Made with a simple shape, and coloured with some basic materials, The book is posed to the characters hand. The scene is finished with the cameras, backdrop and light.
(Fig 13, Character Pose Exercise Body, 5/10/2022)
PROJECT 1
The objective of the first project of this semester is to animate a walk cycle that loops smoothly. Similar to one of the projects done during a animation fundamentals module from previous semester that focused on a 2D walk cycle, I felt many principles from that project applied to this one as well.(Fig 14, Walk Cycle Reference, 12/10/2022)
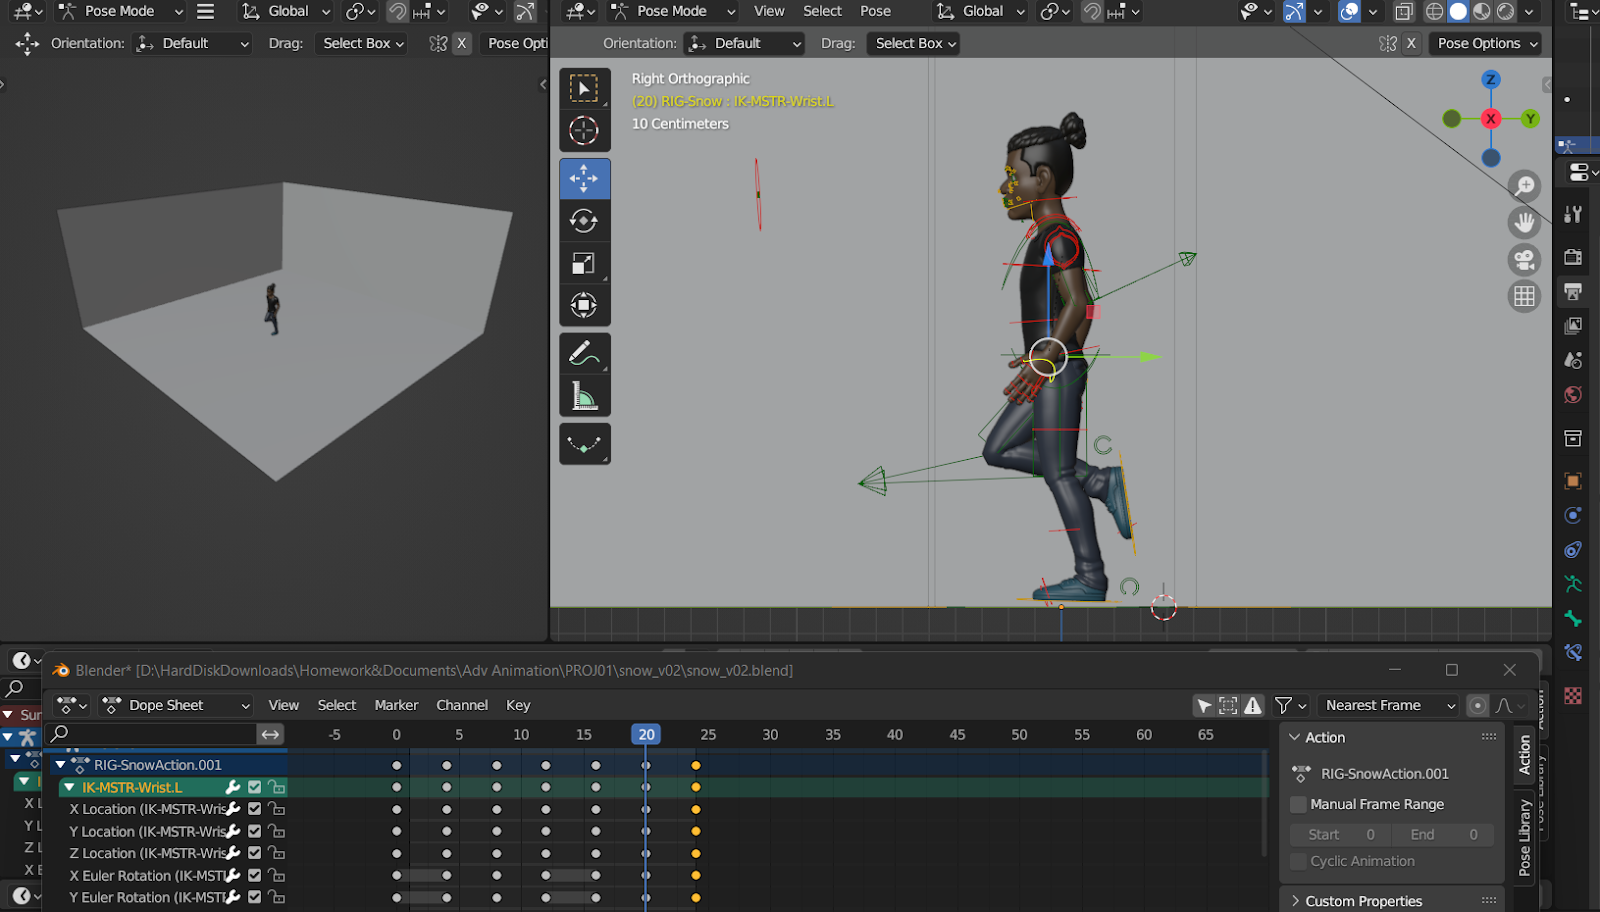
As I wasn't really familiar with animating in 3D, I looked for a reference walk cycle animation using a 3D model. Throughout the walk cycle, it could be broken down into the same types of keyframes as a 2D walk cycle, being the contact, up, passing and then downward.
(Fig 15, Walk Cycle Keyframing, 12/10/2022)
The keyframes for a normal, more realistic walk cycle was easier to keyframe as there was less movement to account for on the upper body. On the other hand, the attitude walk cycle required a lot more exaggerated movement. The large arm movements were tricky to keyframe as they should be over the top, but not anatomically impossible.
(Fig 16, Walk Cycle Pass Pose, 15/10/2022)
Working on the leg movements, it was a little confusing at first as the position of the character was to remain static. As such, the feet had to shift backwards as he takes each step. However, the IK makes it easier to animate as its account for the movement in the rest of the leg, though it doesn't allow for fine tuning the movements.
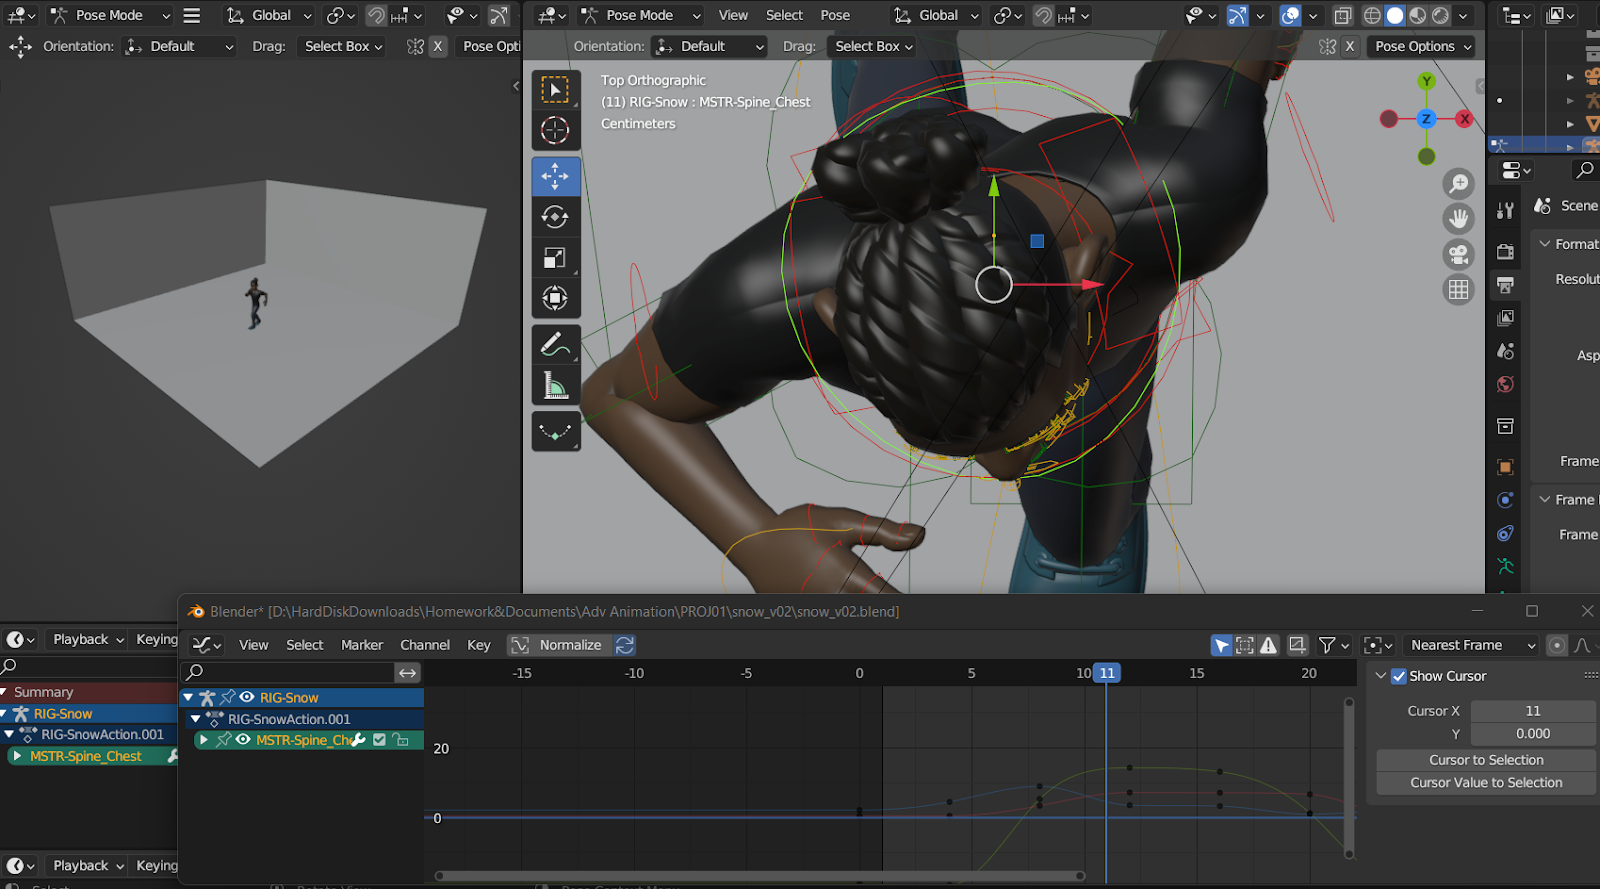
(Fig 16, Torso Rotation, 15/10/2022)
Some of the movements such as the rotation of the upper torso might be less noticeable than the swinging of the arms, but it does just as much to create a realistic looking animation. The head of the character was also animated to always stay looking forward as heads normally don't shift direction when walking.
(Fig 17, Walk Cycle Motion Graph, 15/10/2022)
One of the parts that I hadn't expected to be as difficult was animating the "joint" that the elbows and knees point towards. As the movement between two coordinates in Blender takes the shortest possible route, it sometimes clips into the arms and makes the elbows stick out in odd directions.
(Fig 19, Walk Cycle Final Animation, 15/10/2022)
PROJECT 2
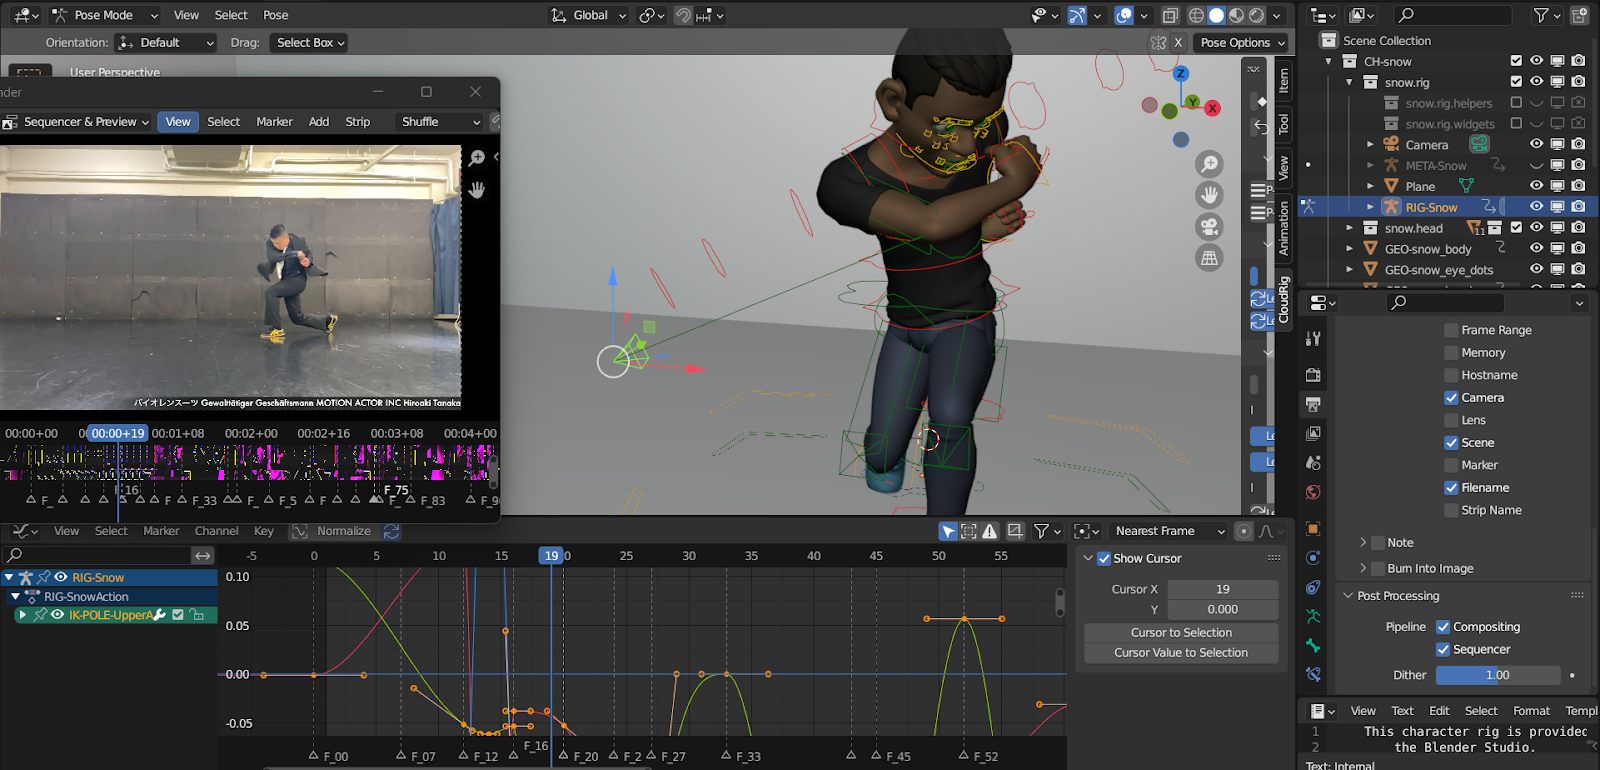
We are required to animate a longer and more complicated sequence of actions using the same model as before. There were a number of reference videos for motion capture that we could find in YouTube, and provided a clear view of the actor to observe most of his movements.
(Fig 20, Reference Video, 22/10/2022)
The reference video is imported into a video sequencer in Blender. In the sequencer, markers are added at the climax of every movement performed by the actor. As the seeker in the sequencer also matches the animation timeline in the main window, it makes it easier to time the movements accurately to the character.
(Fig 21, Project 2 Keyframing, 22/10/2022)
The character was then posed to match the actor in the reference video at every time marker. Though it doesn't mean every part of the rig is keyframed on the marker, only the parts that begin or end a particular motion. Through this, a series of poses are created showing the extremes of every major movement.
(Fig 22, Project 2 Root Bone, 25/10/2022)
One way this project differs from the previous project was that it doesn't loop, and has the character actually moving around in the scene. Therefore, the root of the character was animated to move the character when he performs the action.
(Fig 23, Project 2 Motion Graph, 25/10/2022)
At this stage, the movements between each of the keyframes are rough, with the movements stopping abruptly rather than having the character having to slow down to reach a stop at the end of each movement. That is where the motion graph comes in again. As the motions are a lot more complicated than the average walk cycle, some animations such as the curling of fingers did not really warrant correction with a motion graph as they do not offer much difference.
(Fig 24, Project 2 Motion Graph, 25/10/2022)
A basic green box with lighting was set up in the environment, to render the animation from a few different camera angles. The different angles were then compiled in After Effects for the final output video.
(Fig 25, Project 2 Final Video, 25/10/2022)
PROJECT 3
The last project of the semester is a practice on creating appealing facial expressions from a real reference video. We were instructed to take a video of ourselves performing a series of different facial expressions in one take, and the animation focuses on the change between each of these said expressions.
(Fig 24, Self Taken Reference Video, 12/11/2022)
Similar to the project done previously, a series of time markers are also added onto the video in the sequencer. Instead of large swinging movements of the limbs and body, the time markers now denote the start/end of the movements for every part of the face, such the eyelids, eyebrows, mouth corners.
(Fig 25, Neutral Expression, 12/11/2022)
Taking notes from the exercise on body posing, I started by working only on all the motions for the facial expressions before moving onto the body posing. Asides from the starting neutral expression, all the other expressions have keyframes that start and end over a range of around 50 frames, rather than having them all in one frame.
(Fig 26, Facial Animation Sideways View, 23/11/2022)
Due to the fact that video can only capture a 2D perspective of myself as the reference, there inevitably has to be some guesswork when creating the animations of the face from different axes perspectives. For example, the mouth would protrude forward when pouting. Also more subtle movements such as the rising and lowering of cheekbones during the change of expressions were also harder to gauge and required some educated guessing.
(Fig 27, Hand Posing, 23/11/2022)
For the posing of the body, there isn't a focus on full body movement and we only had to animate movement from the waist up. As such, there should be more emphasis on acting with the movement of the hands and head. The movements of the hands were quite exaggerated, with a thumbs up for the happy expression, hands up for surprise, a closed fist for anger, hand to shield for fear and dropped hands for sadness.
(Fig 28, Project 3 Motion Graphing, 23/11/2022)
For both the facial expressions and the body movements, they would require tweaking with the motion graph as well, as most animations do not have linear speeds. However, for facial expressions, it is more difficult to find out whether a particular movement requires this alteration, such as those for the twitching of the eyebrows.
(Fig 28, Environment Setup, 23/11/2022)
The scene is then finished with the basic environment setup and rendered, with one closeup of the face, and another with the entire upper body. The finished animation is then compiled in After Effects.
(Fig 29, Project 3 Final Video, 28/11/2022)
Feedback
WEEK 1: No feedback yet as it was only the first week of the semester.
WEEK 2: Mr. Kamal said that I looked to be familiar with the keyframing tools in Blender and it was good to have some background on interacting with the interface.
WEEK 3: No feedback this week as it was the Malaysia Day holiday.
Reflection
WEEK 1: As 3D animation was something I was looking to get into, I'm quite excited to begin this module.
WEEK 2: Animating the ball itself was fun. However, seeing that a simple ball has three different bones for a simple shape, I was a little intimidated by full body rigs that we would possibly be animating later on in this semester.
WEEK 3: As there was no classes this week, there wasn't much to do in terms of work for this module.
WEEK 4: The pendulum animation exercise was quite simple in principle, but due to unfamiliarity with the animation tools in Blender, it was difficult to get the motion graph right.
WEEK 5: This week we started working on the character posing exercise. With the techniques we learned in controlling the two different types of rig on the character, at the same time we were introduced to Project 1.
WEEK 6: Using the walk cycle reference, I analysed the keyframes of the walk cycle and realised that they share similarities to the keyframes used in the Animation Fundamentals module from before.
WEEK 7: Practically executing the animation of the walk cycle was done this week. I did face some of the same challenges as those when doing the ones for the pendulum swinging exercise.
WEEK 8: It is Independent Learning Week, and I focused my efforts more on the different modules that had assignments due in the coming week. So far I seemed to be on schedule, at least.
WEEK 9: I continued working on keyframing the movements across the combo movement of Project 2. The movements itself was quite complicated as the wide view of the character made it difficult to find the smaller details of the movement.
WEEK 10: I worked on finishing and polishing the animation for Project 2. The fighting combo movement of the character was quite accurate in terms of the timing of the keyframes, however even with editing the motion graph, I felt that the speed at which these movements occurred still didn't match the reference.
WEEK 11: I began on working on the animation process for Project 3. As I had quickly recorded the facial reference video, I tried to take note of which parts of the face started to move first when changing the expressions.
WEEK 12: There is a special case holiday this week, and I spent this time trying to catch up with the work across all the modules for this semester. For this module, I worked on animating a few of the facial expressions.
WEEK 13: This week I was working on doing the body poses for Project 3. For this part I didn't have any direct references for the poses that the characters perform. Most of them were poses that I felt were reflective of the emotion that is portrayed by the character at the time.
WEEK 14: My work for this module was largely done by this week. However, I still needed to complete the blogs for this module, which is a bit of a rush.


Comments
Post a Comment